How to Create Your Own Personalized GIF
This post may contain affiliate links, details on that can be found HERE.
Welcome!
If you’re new here, hi! I help you create digital content and graphics, and I specifically create content for many people in the health coaching industry. Thanks for checking things out!
Today, we’re learning about how to create your own personalized GIF. You’ve seen them — animated images. We’re making our own, to be saved and used whenever we want.
Read on for the step by step process on how to create your own GIF using GIF Brewery App.
Note — This is a tutorial for those using a Mac desktop or laptop computer. Scroll down to see all the steps to making your new creation!
What is a GIF?
A GIF is an animated image. An image that moves.
It’s shorter than a video, usually.
It’s a still image that moves for a few seconds, then repeats on loop, typically.
Like the JPEG or PNG file formats, the GIF format can be used to make still images. But the GIF format can also be used to create animated images.
You can also create transparent GIFs, which are useful when you want to get rid of the background of an object in your image.

What is GIF Brewery 3 by Gfycat? (The app we are using.)
According to Apps.Apple.com, GIF Brewery by Gfycat “gives everyone the power to create stunning GIFs from video files. It’s simple, powerful, intuitive to use — and now, it’s free.”
Note - it says it’s free, although I have seen it in the App Store for $4.99. Check the app store to be sure!

GIF Brewery by Gfycat icon, photo via Apps.Apple.com
Step-By-Step Guide
Open the app. (GIF Brewery by Gfycat.)
Open up a video in your desktop or create a new one.
Now, trim your video in the app.
To view it and see if you like how it looks, go to Start and press Play.
Re-size your image: Go down to about 500 pixels.
You can crop it if you want.
Add letters + stickers (optional).
Change the color, font, etc.
Preview it by clicking Start and going to Settings.
Set the frame count to about 50.
For color count, know this: Sliding it to the left makes it less colorful and more gray.
Optional: Add overlays.
HIT CREATE!
Your new GIF you just made is now downloading to your computer.
Save to your desktop or wherever you want.
You can upload your new GIF into Dropbox or something similar, send it to yourself, open it on your phone, and save it to your mobile device!
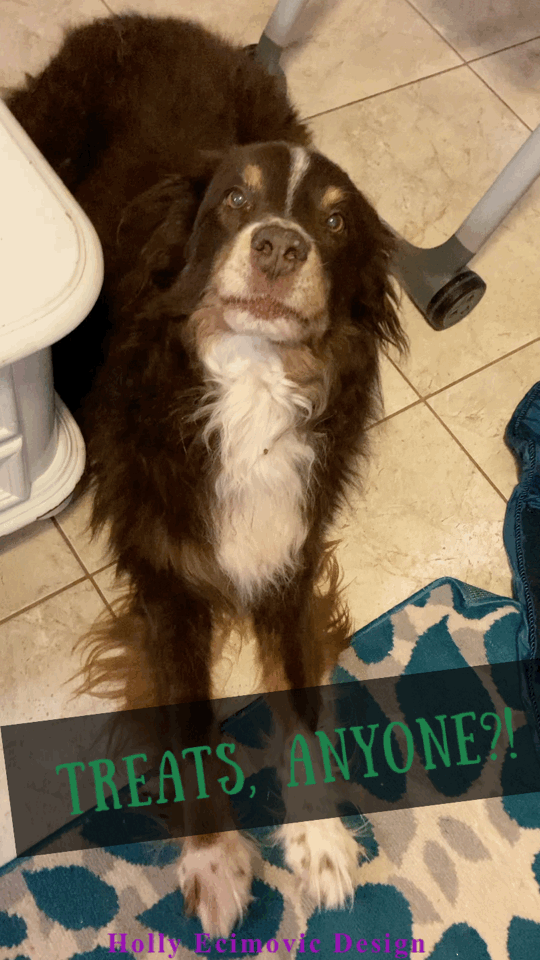
Now, you will have it on your phone, so you can use it in text messages, on social media, or even when you leave comments on social media, like Facebook and Twitter. Below are two examples of GIFs I have made:
“If you’re always trying to be normal, you will never know how amazing you can be. ”

Thank you!
See the video tutorials on how to create content over on HollyEcimovic.com.
Grab your FREE Social Media Image Size Guide, HERE.
Tag me on Instagram if you found this article useful! @hollyecimovic_design
Don’t have the time to make your own GIF images, but want some? I can do it for you! Email me at TechSupport@HollyEcimovic.com. Cross it off your to-do list!
